| |
Introduction to GT test kit
|
| |
|
| |
|
| |
- Introduction to basic testing
|
|
Introduction to GT test kit |
|
Introduction to basic testing
|
If you uncertain with proportion that have said
in this article; please click here
|
 |
|
(1) Pour 5g (fill up to level 2 on the plastic
bottle) of finely cut food sample into the plastic bottle.
|
 |
|
(2) Pour 5cc or enough to cover the sample,
of extracted solvent, shake well and leave it for 10-15 minutes.
|
 |
|
(3) Suck out 1cc of the solvent from instruction
no. 2 into a test tube and then place the tube into an evaporation
basin. Heat until all the solvent has evaporated.
|
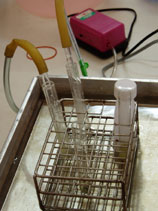
From now on all methods will be operated in
water bath (as in picture 3)
(4) Label and fill in 3 new test tubes with the
following: |
 |
|
(4.1) Test tube 1 labels "Judge" tube: 1cc of solvent
2
(4.2) Test tube 2 labels "Control"tube: 1cc of
solvent 2
(4.3) Test tube 3 label "Sample" tube: 1cc of sample
extract from instruction no.3.
|
(5) Add 0.50cc of GT-1 into each test tubes,
leave for 5-10 minutes.
|
 |
|
(6) While waiting as specified in instruction
no.4, pour GT-2.1 into GT-2 to make a mixed solvent GT-2
and then pour GT-3.1 into GT-3 to make mixed solvent GT-3.
|
 |
|
(7) Pour 0.375cc of mixed solvent GT-2 into
test tube 1, pour 0.25cc of mixed solvent GT-2 into test
tube 2
and 3 and leave them for 30 minutes.
(8) Pour 1cc of mixed solvent GT-3 into each test tubes followed by 0.5cc of
GT-4. Shake well and then add 0.5cc of GT-5, shake well, compare and analyze
the
colors with the reference table.
|

Reading result table
|
Color in sample tube(s)
|
Result
|
Sample tube has less color than control tube.
|
1. Not Detect
|
Sample tube has greater color than control tube.
|
2. Detect but safe to be consumed
|
Sample tube has greater color than critical tube.
|
3. Detect and not safe
|
|
|
These
are the link to other topics under
" Introduction to GT test kit"
1 | 2 |
3
|
| |
|
|